Hi, Andrew,
Thanks for your detailed reply.
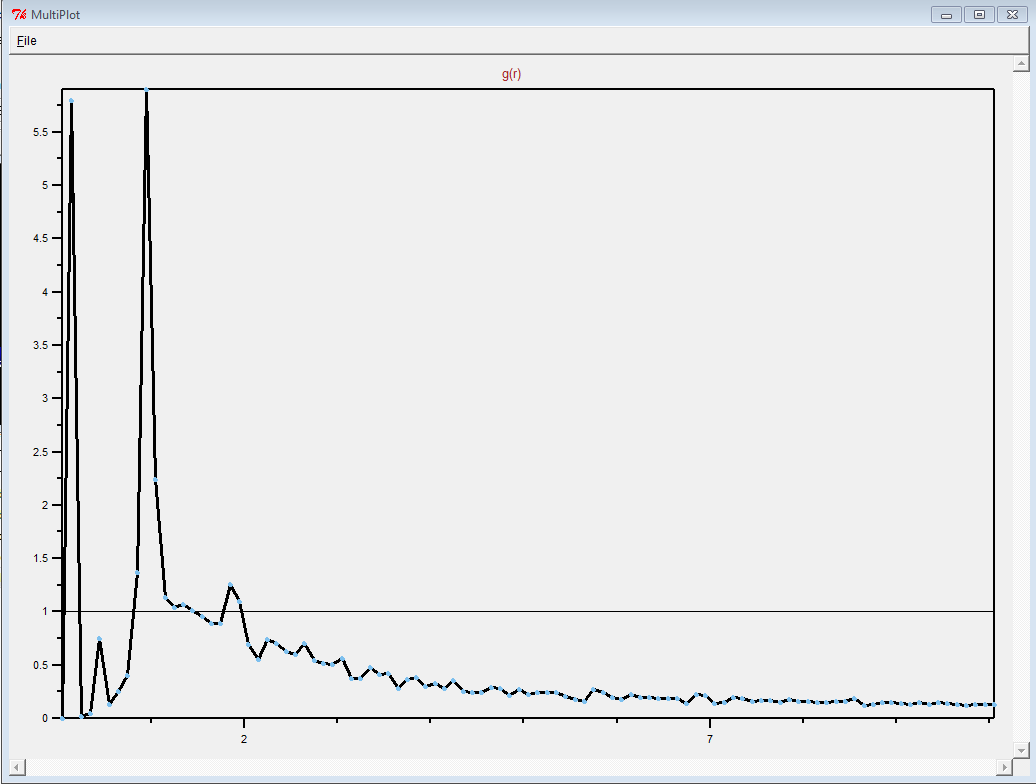
Initially, I used pair style soft 1.12 to prepare the polymer, as I change
the spacing between chains(constant), the system behaves differently.
Please disregard my earlier comments. I did not see the files you
attached to your first post. My comments were not relevant. It seems
like the problem you are having is more fundamental. I downloaded the
"wholesmall6.data" file and looked at it in VMD.
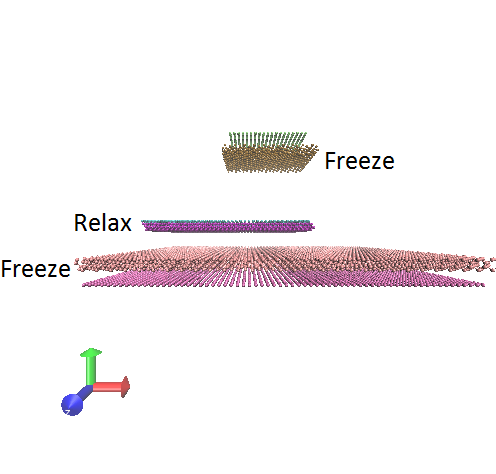
First of all, this is a pretty complicated system. It is definitely
not just a simple polymer melt.
I would start with a system with a single polymer, or a few polymers.
Once you can get that to work, then
add walls, slabs and other objects if you need them.
Sometimes prompt the warning message: FENE bond too long. This was done by
Moltemplate
Sure. It's easy to make messy polymer structures using moltemplate.
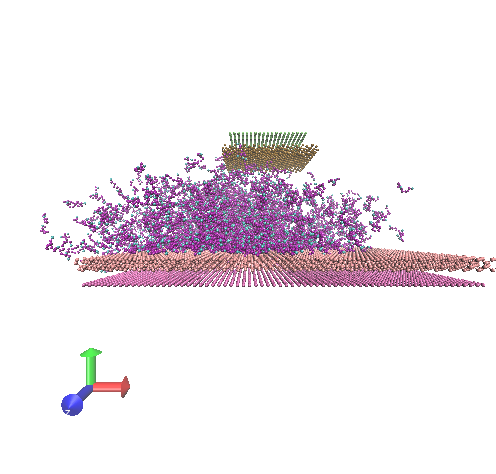
(It was difficult to see anything resembling a polymer in the
"wholesmall6.data" file, but this is probably because there was so
much atom overlap.)
Thank you for sharing what worked. Making polymer melts is hard.
If you are simulating a simple chain of atoms, or multiple simple
chains of atoms, feel free to use the chain.f tool. It should work.
Moltemplate is only really useful for more complicated polymers with
multiple atoms per monomer. In that case you have to worry about
monomer position (and orientation).
For others who are curious, here is some advice about making polymer
melts using moltemplate.
---- Don't use straight polymers: ----
To use moltemplate to build a polymer with 10 monomers (each of which
contains multiple atoms), you typically would use a command like this:
monomers = new Monomer [10].move(3.4,0,0)
(... and then you must remember to manually connect the monomers
together with 9 bonds)
This will make straight polymers. This is not a particularly a good
initial starting shape for long polymers in a melt (longer than the
length of the simulation boundary box).
---- Start with a space-filling curve ----
Moltemplate can read coordinates from an external file, but for
complicated polymers (with multiple atoms in each monomer), this is
not very helpful.
To make a polymer melt in moltemplate, I currently recommend:
1) Use a separate script to generate coordinates for where you want
the monomers to go initially (typically some kind of space-filling
curve on a lattice). You could also use a random-walk generator. (A
string of random coordinates separated by fixed bond-lengths.). But
keep in mind that a random-walk is a more extended curve which might
not fit inside the periodic boundary conditions you are using.
(Perhaps this does not matter.)
2) Then write a for loop which reads these coordinates and generates a
moltemplate file ("system.lt"). That file contains a list of "new"
commands with ".move()" and "rot()" or ".rotvv()" coordinate
transformations to tell moltemplate where each of the monomers should
go (and what direction that they should be pointing in).
If all the polymers have the same length, you can define a single
"Polymer" molecule and make multiple copies of it using the "new"
command:
import "polymer.lt"
polymers = new Polymer [3].move(0, 0, 30.0)
[3].move(0, 30.0, 0)
[3].move(30.0, 0, 0)
Otherwise (more generally) I would use just create one big file with
all of the monomers in one big list, and delete (or omit) bonds which
would otherwise connect atoms in different polymers together.
3) Then I run moltemplate on that file ("system.lt").
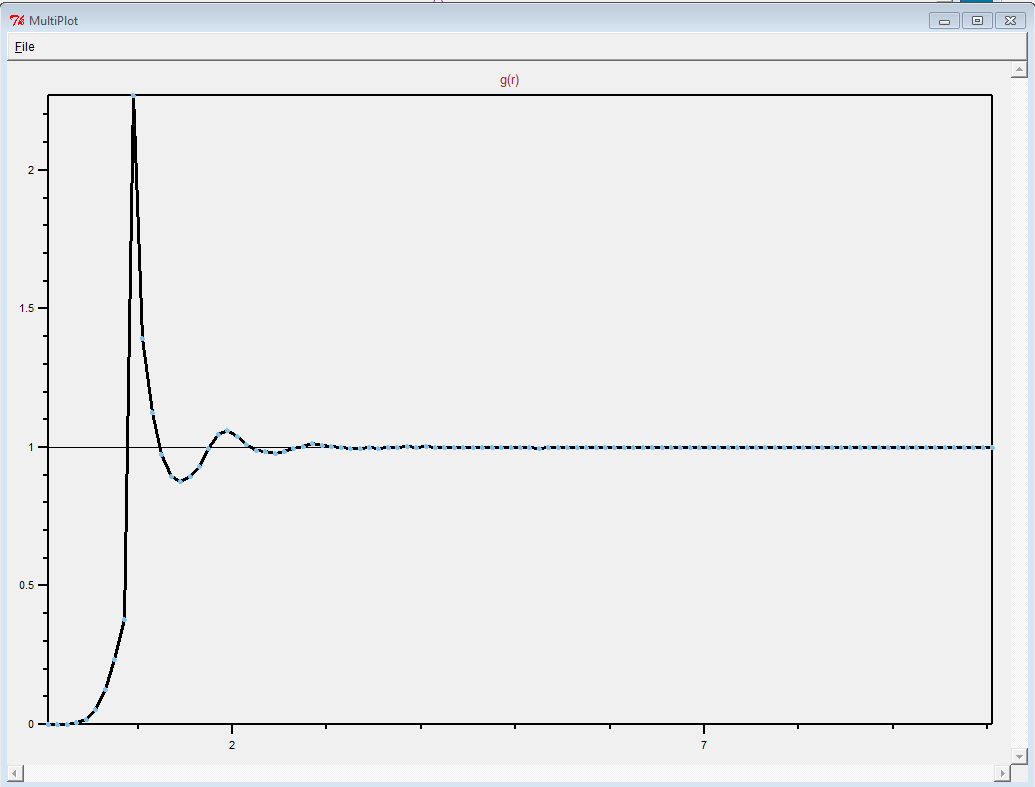
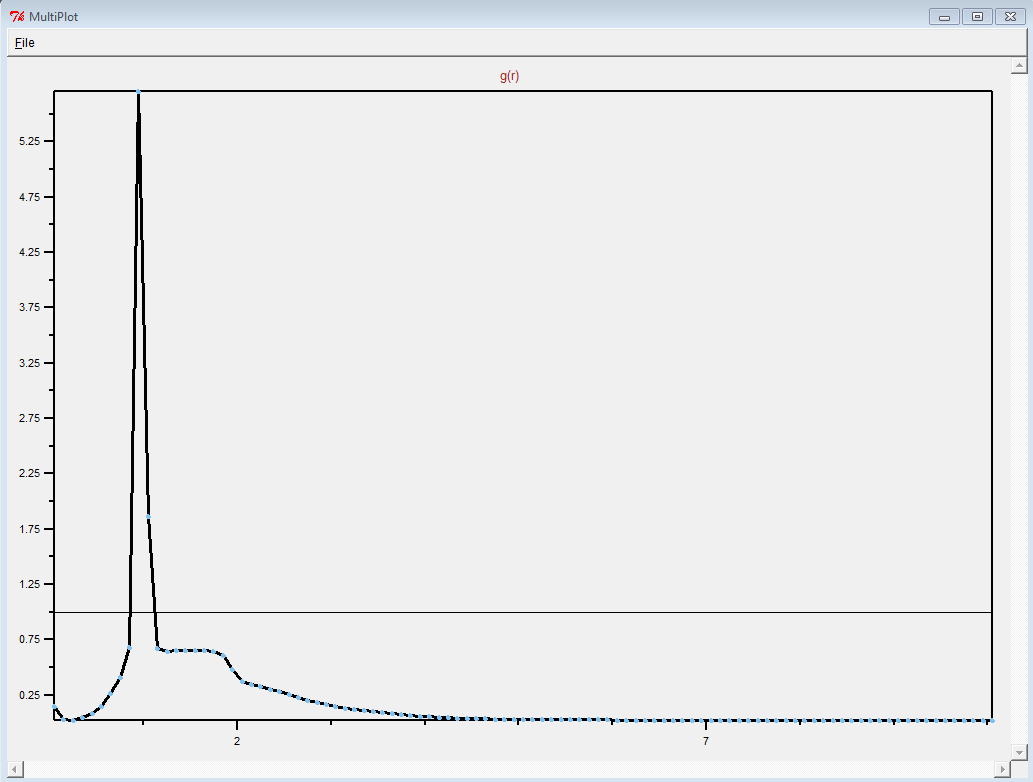
4) Then I run a simulation in LAMMPS using pair_style soft to
equilibrate the polymer.
----- summary ----
Moltemplate gives you a lot of flexibility to do what you want. But
it's not easy to use.
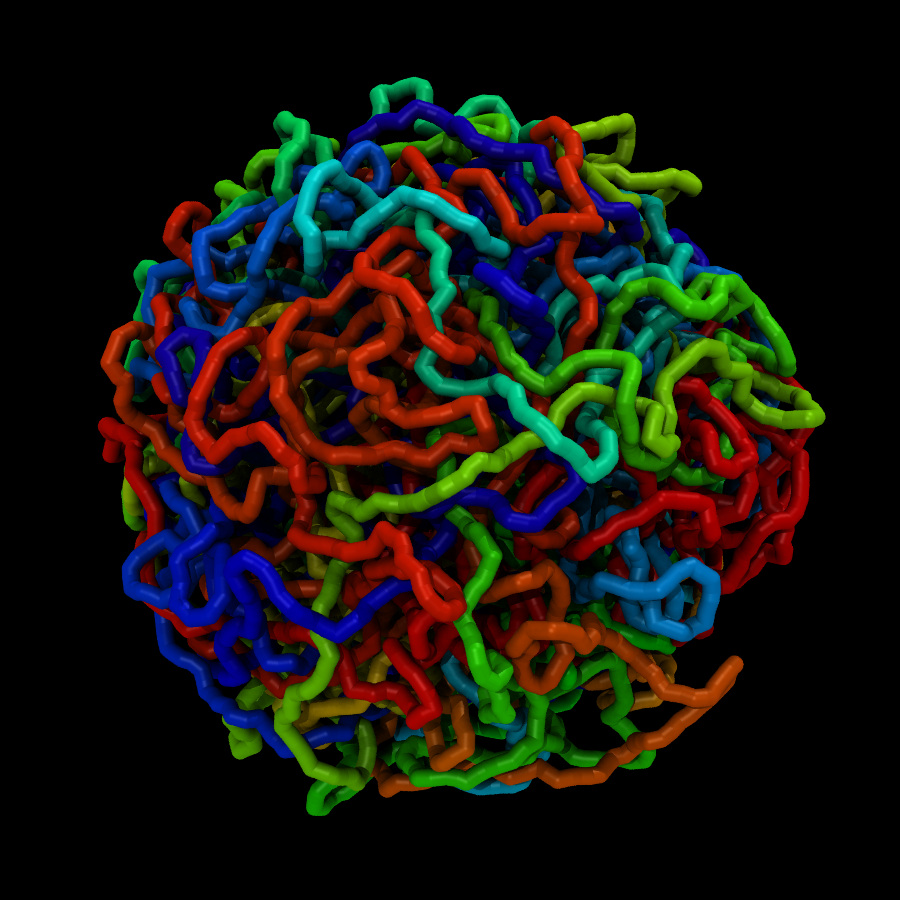
(For example, I've been using moltemplate to construct polymers bent
in the shape of "crumpled-globule" shapes which were generated by
somebody else. These are not polymer melts.)
There are probably other tools that can make polymer melts in fewer steps.
For anyone who is still interested, I will post an example which does
these four steps with the next moltemplate release.
Cheers
Andrew

